
 Apply For Jobs
 Get Hiring Updates
MS Word

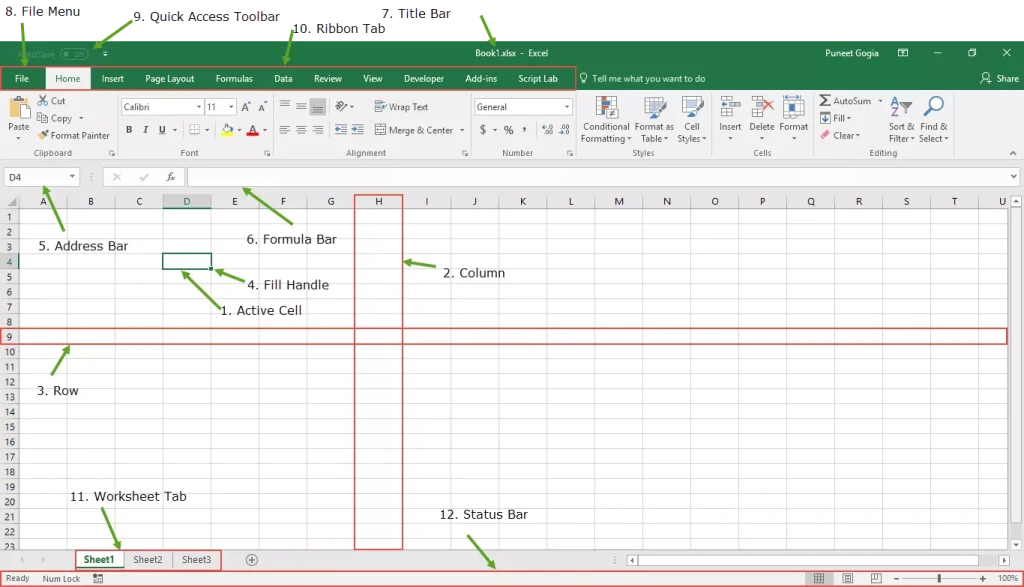
Microsoft Excel
MS Power-point

MS Outlook

MS Access
MS Publisher
MS Word
Microsoft Excel
MS Power-point
MS Outlook
MS Access
MS Publisher


Login/Signup to comment


Get Hiring Updates right in your inbox from PrepInsta
hey i want to make a purchase of this accenture thing,how to do that
Worst platform ever, literally shit! , 1Website is too cluttered , can’t find things and they are not at all organized, 2. The website too is shitty, too buggy and even the quizzes of some topics (idk somehow hardly found them, thank god) they too have incorrect answers and shit website behavior, had to reload, same quiz under multiple names, waste of money, though even it is free it is shitt. Do not ever buy their shit subscription. O NOT WASTE YOUR MONEY ON SHITTY SHITINSTA
If I buy accenture mocks do I get all the mocks or do I not get the one under prepinsta prime?
what are the exact features I get?
Hey Nabanita! Please reach out to us at 8448440710 or drop a text on WhatsApp
Where can I find Iecture vedios based on MS office and Networking Security?
Hi,The course is availble on prepinsta prime. Here is the link https://prepinstaprime.com/
Please provide material with details to prepare well can get more score
Hey,
Please reach out to our support team for better assistance on the same.
if we clear cognitive assessment and technical assessment with out clearing coding round can they allow us to sit in the interview
Hey, all the rounds are elimination type except communication. ✌
Content for Common applications on MS office is too small, but the quiz questions are apart from it.
Hey, We will surely forward your message to our team.?